Gluten-Free Taralli Recipe
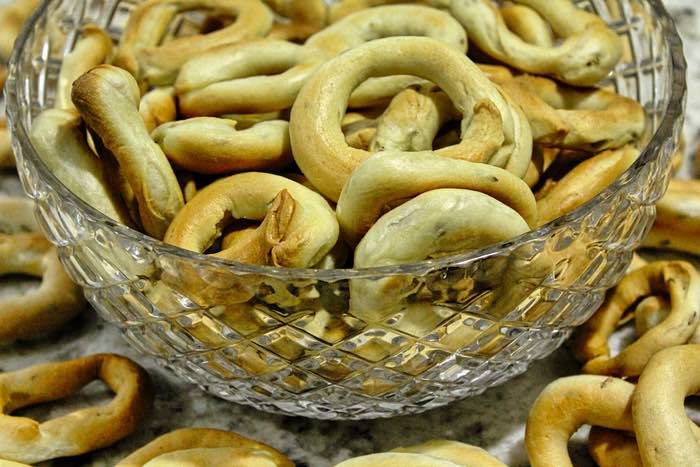
Hey guys, I’ve just published a video on how to make delicious gluten-free taralli. Follow my gluten-free taralli recipe to make your own gluten-free taralli. My mother always used regular flour, which meant that my daughter couldn’t eat them because she couldn’t tolerate gluten.
That’s when I decided on my gluten-free taralli journey. As I explained in the video, the first batch was useless because the dough wouldn’t roll into those little log shapes as the dough was too crumbly. I needed something to help bind the dough, and I found the best thing for that was Xantham gum.
Other than that, the taralli making process was pretty much the same as when making regular taralli. So, without further ado, here is Nonno’s Favourite Gluten-Free Taralli Recipe.
Gluten-Free Taralli Recipe
- Three cups gluten-free flour (360 grams)
- One cup water (250ml plus a tablespoon to be perfectly precise 😆)
- One teaspoon active dry yeast
- One teaspoon salt
- Two tablespoons Olive oil
- One tablespoon fennel seeds
- Two teaspoons of Xanthan Gum.
- Dissolve the yeast into two tablespoons of warm water and let it stand for 10 minutes or until you see bubbles appearing on the surface.
- Add the olive oil to the water.
- Add the flour, salt, Xantham Gum and fennel seeds into a mixing bowl.
- Mix everything together, make a crater in the flour, and pour in the water and olive oil mix.
- Work the ingredients together with a wooden spoon until the flour absorbs all the liquids.
- Turn the dough onto your bench and work the dough by overlapping one end onto the other for about 10 minutes.
- Cover the mixed dough with a tea cloth for 20 minutes.
- Transfer the dough to your working surface and into portions so you can shape them into small logs.
- Stretch and roll each piece from the centre outward to about 8 inches in length and overlap the two bottom ends, pressing down gently.
- Transfer to a lightly floured tray or plate and cover with plastic.
- Preheat oven to 400°F (200°C), set rack to middle position and line the baking trays with greaseproof paper. To save time, I placed two trays as close to the middle of the oven as possible.
- Have a pan half-filled with water set to boil.
- Once the water comes to a boil, work with small batches and add the taralli into the boiling water. Let them submerge and when the taralli rises to the top, about 30 seconds, remove it with a slotted spoon or strainer and transfer onto a tea towel.
- After you have placed all the taralli onto the tea towel, start transferring them to the greaseproofed baking trays.
- Place the tray (or trays 😆) into the oven and baking for approximately 35 minutes or until the taralli is light golden brown.
- Baking time will depend on the weight and thickness of each taralli, so keep an eye on them.
- Remove from the oven and let them cool before eating.
Let them sit until the next day before storing them in an airtight container. I didn’t do that the first time and my taralli’s lost their crunch.
If you enjoy your tasty gluten-free taralli please share this post. If you liked this post, please head over to YouTube and give my video a thumbs up.
Other Topics To Keep You Entertained
And now, for my customary self-promotion of my growing YouTube Channel. As you know, I’m always looking for new subscribers, so why not consider subscribing to my My Bonzer Channel. My most popular video, with over 20k views, is the funny golf video. Wouldn’t it be great if my funny cricketer joke became as popular?
If you ever wondered how to remove a background from an image, you should watch my Removing the background with InPixio Photo Clip. I’ve also found LuminarA1 to be a fantastic photo editor.